Build the roof platform
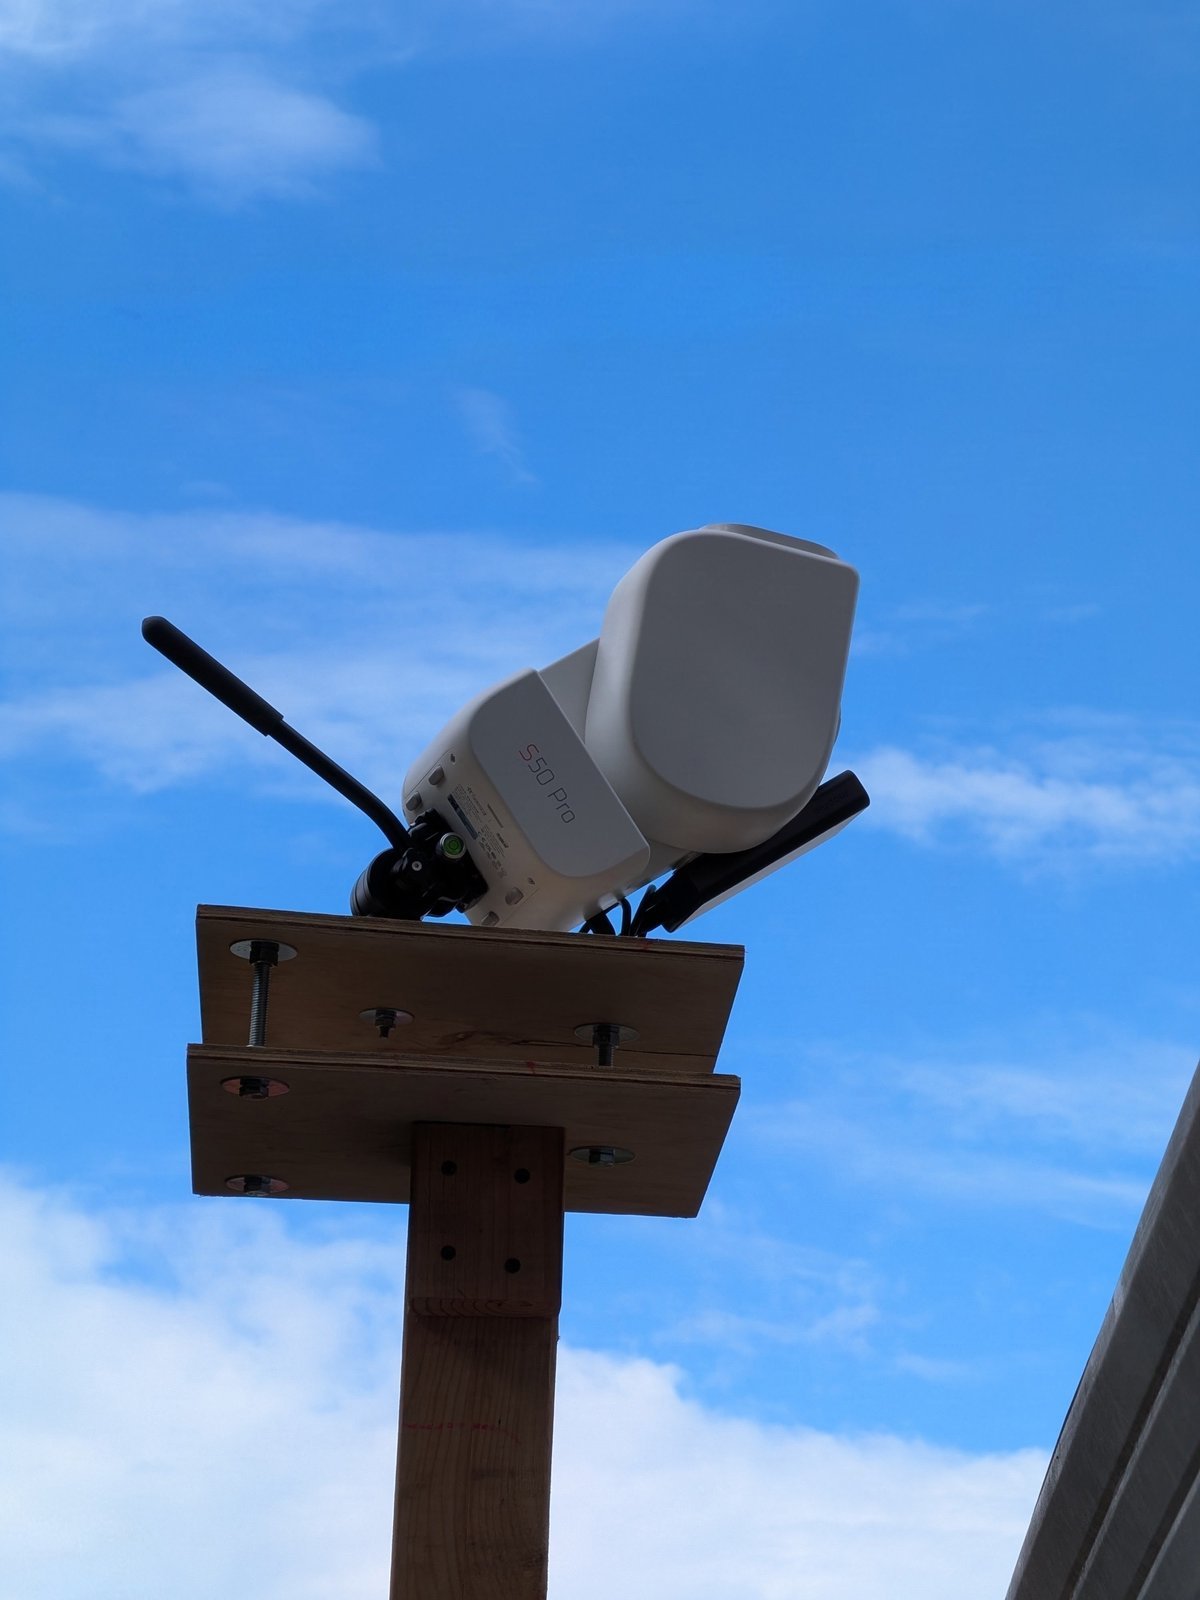
The telescope behind this site is a ZWO Seestar S50 Pro. It lives on a small wooden platform bolted to the eave of a house, and this page shows how to build one.
The scope sits on a ZWO TH10 tilt head, often called a wedge. The wedge leans the scope over so it turns around the same axis as the Earth, which lets it take long exposures without the view rotating. For that to work the wedge has to point at the celestial pole. Getting it there is called polar alignment, and it takes a while to set up. The point of this platform is that you only do it once.
How it works
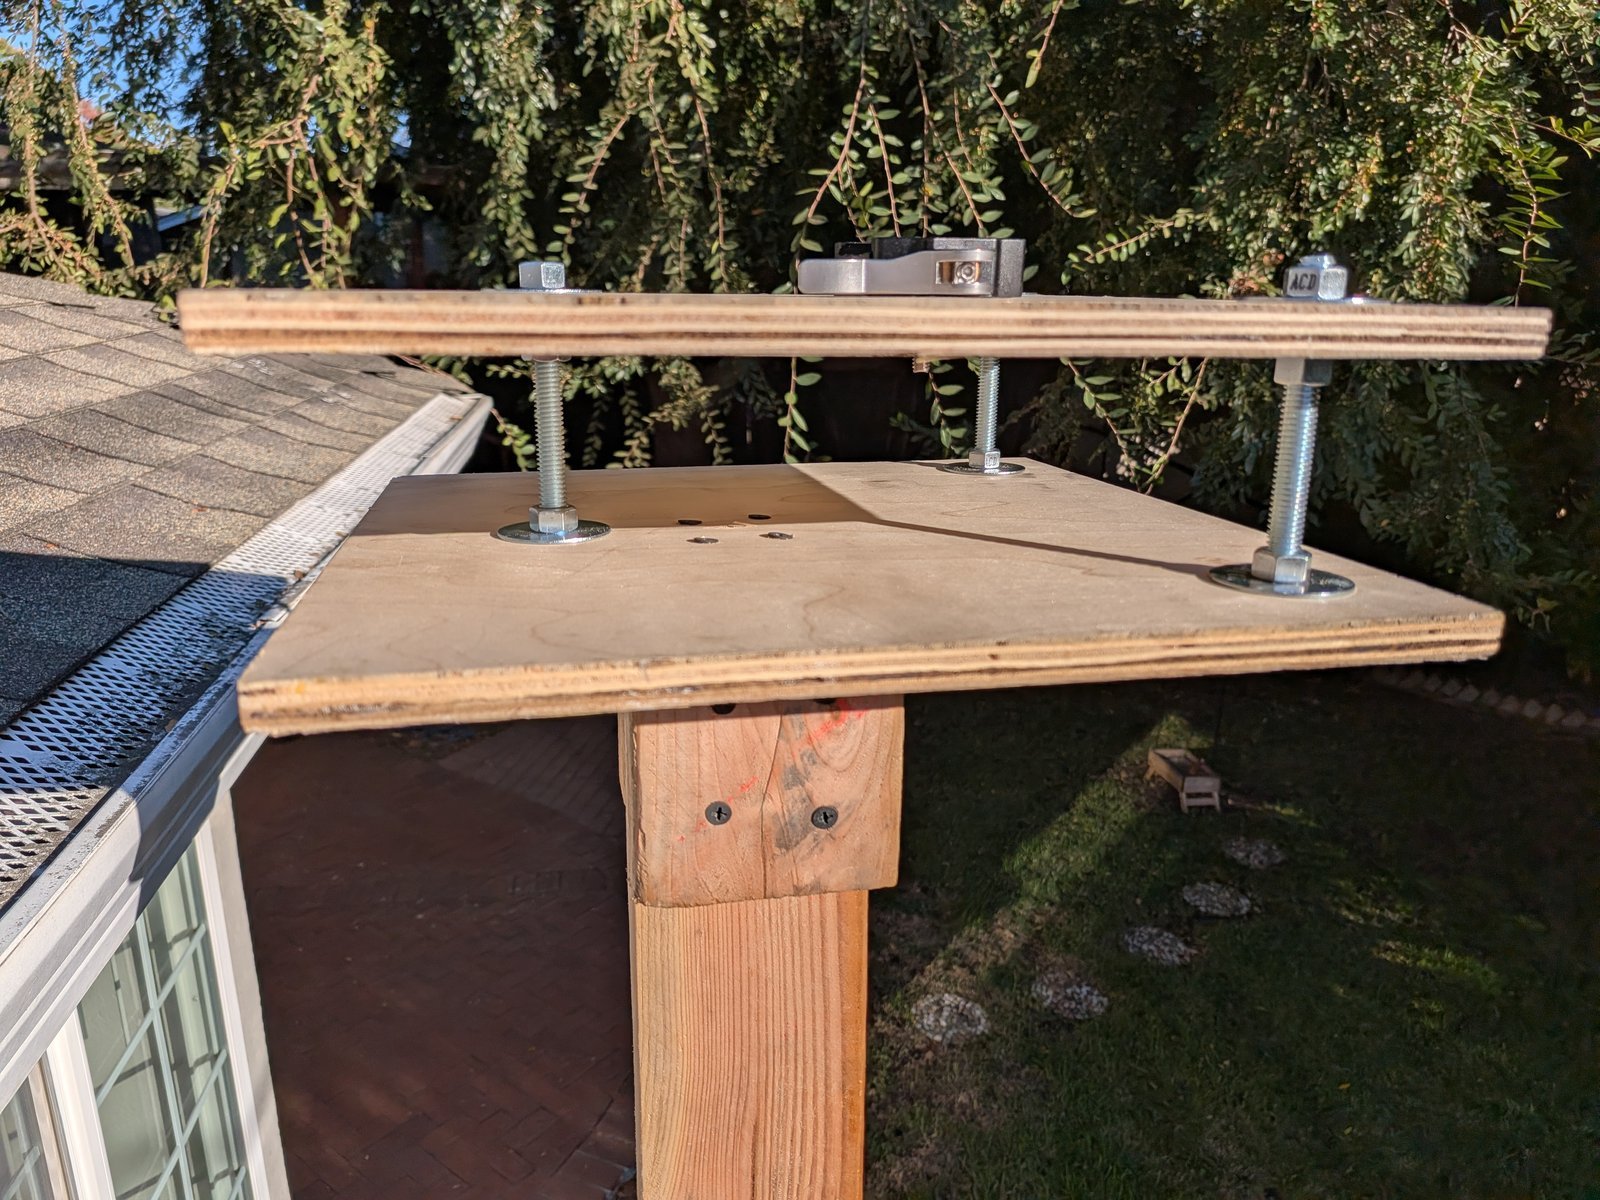
Two plywood squares, one above the other, joined by three bolts. The base plate is screwed to the top of a 2x4 bracket on the eave. The top plate rides on a nut on each bolt; turning those nuts levels it, and a second nut on each locks it.
On the top plate sits an Arca-Swiss lever clamp. Arca-Swiss is the common camera-tripod quick release: a plate with angled edges that drops into matching angled jaws. A plate is screwed to the bottom of the TH10 and stays there. To put the scope out, set the plate in the clamp, slide it to the stop and flip the lever. To bring it in, flip the lever and lift.
The angled edges can't rotate or rock in the jaws, so the TH10 lands at the same angle every time. Its pan and tilt are locked once aligned. Nothing you touch on a normal night changes the alignment: on this build, after the scope spent a day indoors, it came back within 0.05 degrees of the night before.
Parts and tools
The head
| Part | Qty |
|---|---|
| 1, 2. Plates. 3/4" exterior plywood (BC/ACX) or Baltic birch, 11 x 11"One 2 x 2 ft panel makes both, $15-30 | 2 |
| 3. Leveling bolts. 3/8"-16 x 4-1/2" hex bolts, stainless or hot-dip galvanized | 3 |
| Nuts for the leveling bolts, 3/8"-16 | 9 |
| Washers. 3/8" flat washers (6) and 3/8" x 1" fender washers (6) | 12 |
| 4. Lever clamp. Arca-Swiss lever clamp with a 3/8"-16 socket underneath. A Leofoto LR-50 is plenty, and its built-in bubble levels the plate$30-45 | 1 |
| Clamp bolt. 3/8"-16 x 1-1/4" hex bolt + flat washer | 1 |
| 5. Plate for the TH10. Arca plate that fits the clamp (Leofoto NP-50 for the LR-50). Its screw is 1/4", so use the 3/8-to-1/4 bushing from the TH10 box$20-25 | 1 |
| Finish. Exterior spar urethane or exterior paint | 1 can |
| Small stuff. Blue threadlocker (Loctite 242/243), anti-seize, a white paint pen | 1 each |
| USB power bank (optional). The scope's own battery lasts about 4 hours; a power bank strapped to its side and plugged in runs it all night | 1 |
About $110-150. Only the clamp and plate don't come from a hardware store.
The bracket
| Part | Qty |
|---|---|
| 2x4. 8 ft, pressure-treated | 1 |
| Bolts. 3/8" x 4-1/2" hex bolts, each with a nut and two flat washers. Every joint is two 1-1/2" thicknesses (2x4 on 2x4, or 2x4 on rafter), so one length fits all | 6 |
| Screws. 3" exterior structural screws (GRK, SPAX): 4 for the ears, 4 for the base plate | 8 |
| Exterior wood glue, for the ears | 1 |
| Cardboard. A big flat piece for tracing your eave | 1 |
Cut list
| Piece | Size |
|---|---|
| Plates, 3/4" plywood | 2 at 11 x 11" |
| Rafter arm, 2x4 | about 20" |
| Horizontal arm, 2x4 | about 26" |
| Post, 2x4 | about 22" |
| Ears, 2x4 | 2 at about 6" |
The 2x4 lengths are scaled from photos of this build. Your eave will differ: cut from your own cardboard template.
Tools
- Drill and bits: 1/8", 3/16", 3/8" and a 5/8" spade bit. The 3/8" bit needs to reach 3" for the bracket joints
- Saw (jig, circular or hand), or have the store cut the plywood squares
- Two 9/16" wrenches (or a socket and an open-end), for the 3/8" nuts and bolts
- Two clamps, a torpedo level, square, tape, pencil, the hex key that comes with the Arca plate
- A phone compass set to true north
- A sturdy ladder and a helper for the mounting day
Build the head
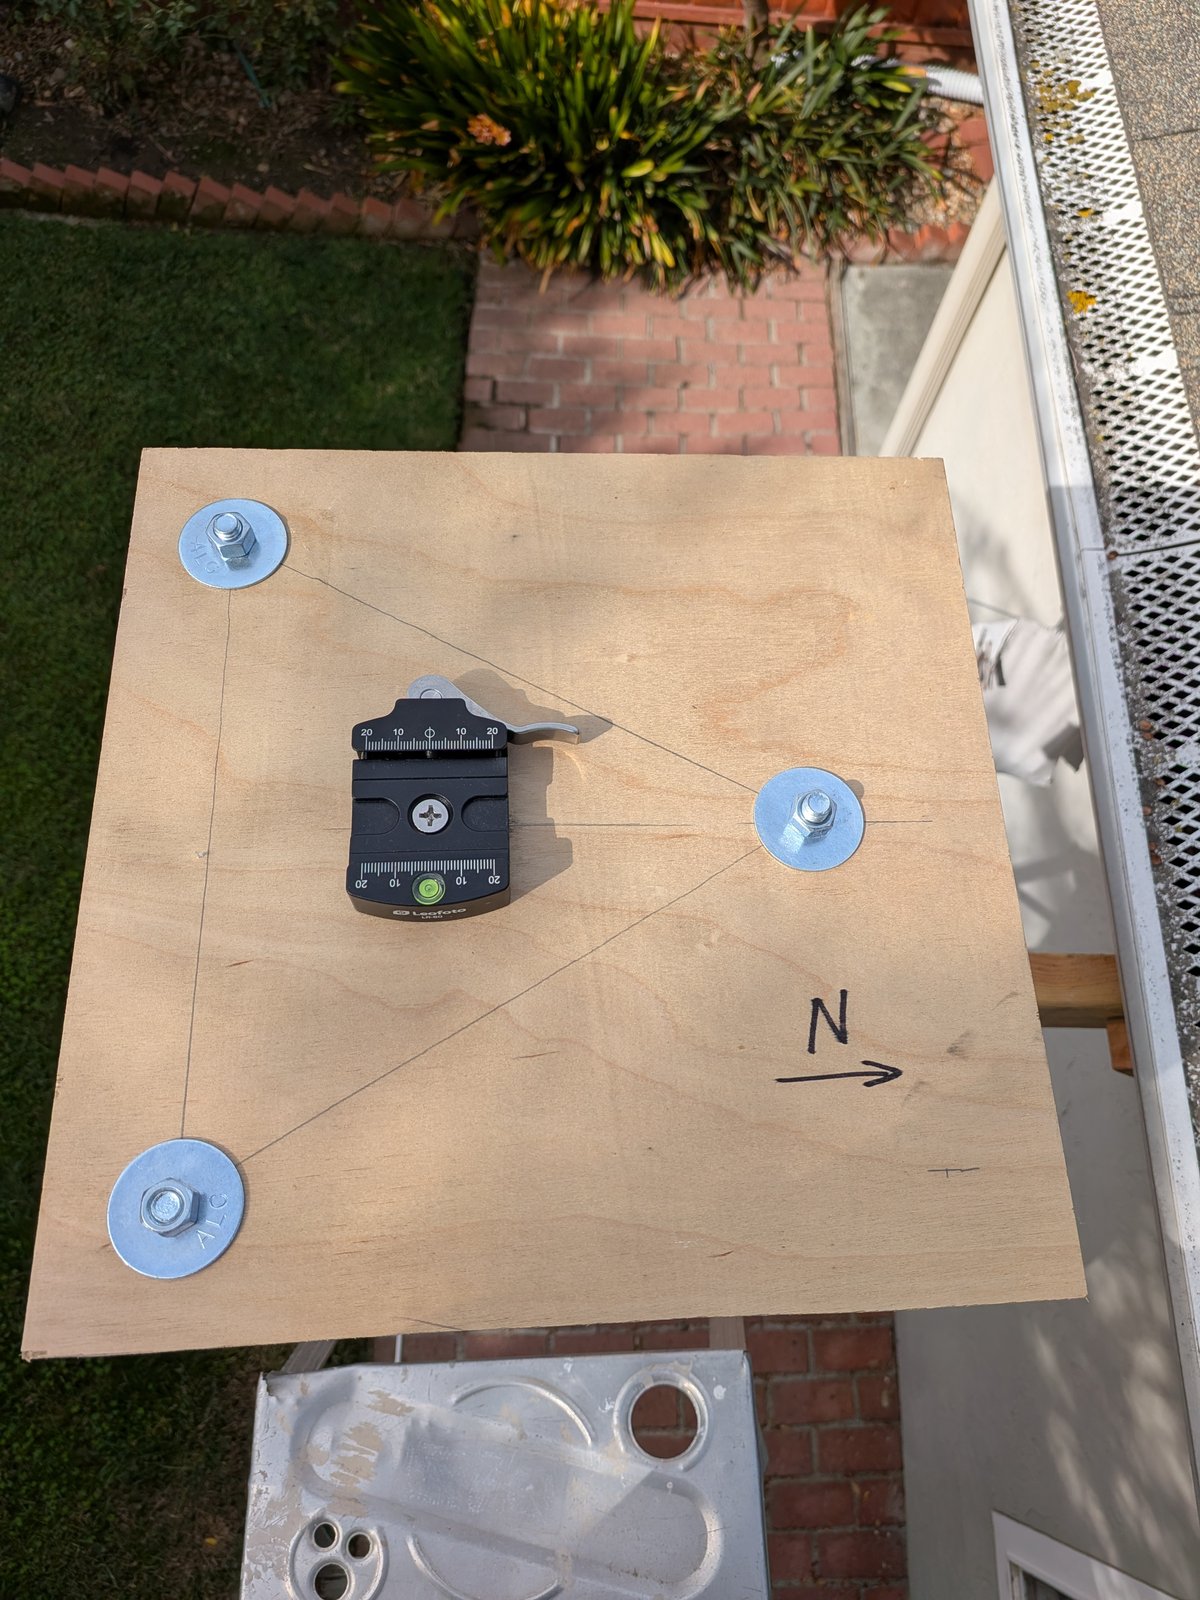
Bolt positions, from the centre of the plate: N bolt 4-1/4" north. SE and SW bolts 3-11/16" east and west, 2-1/8" south.
- Cut two 11 x 11" squares and sand the edges. Draw an N arrow on each.
- Clamp them together, arrows matched. Mark the centre and the three bolt points, then drill 3/8" through both at once so the holes line up.
- Top plate: open the three holes to 5/8" so the plate can tilt. Drill a 3/8" clamp hole about 1" south of centre.
- Base plate: drill four 3/16" holes, spread across a centred 4-1/2 x 3-1/2" rectangle (the post plus its ears), for the screws.
- Seal both plates: 3 coats on every face, edge and hole. Let it cure a day.
- Push a leveling bolt up through each base-plate hole from underneath, flat washer under the head. Anti-seize the threads, then a flat washer and nut (A) on top. Tighten with two wrenches.
- Run a second nut (B) down each bolt, then a fender washer. Set all three washer tops 1-1/2" above the base plate.
- Bolt the clamp to the top plate from underneath (1-1/4" bolt, washer, threadlocker), jaws running north-south, lever on the west side. Paint a line from the clamp onto the wood so you can see if it ever turns.
- Drop the top plate over the bolts. Fender washer and nut (C) on each, finger tight for now.
Build the bracket
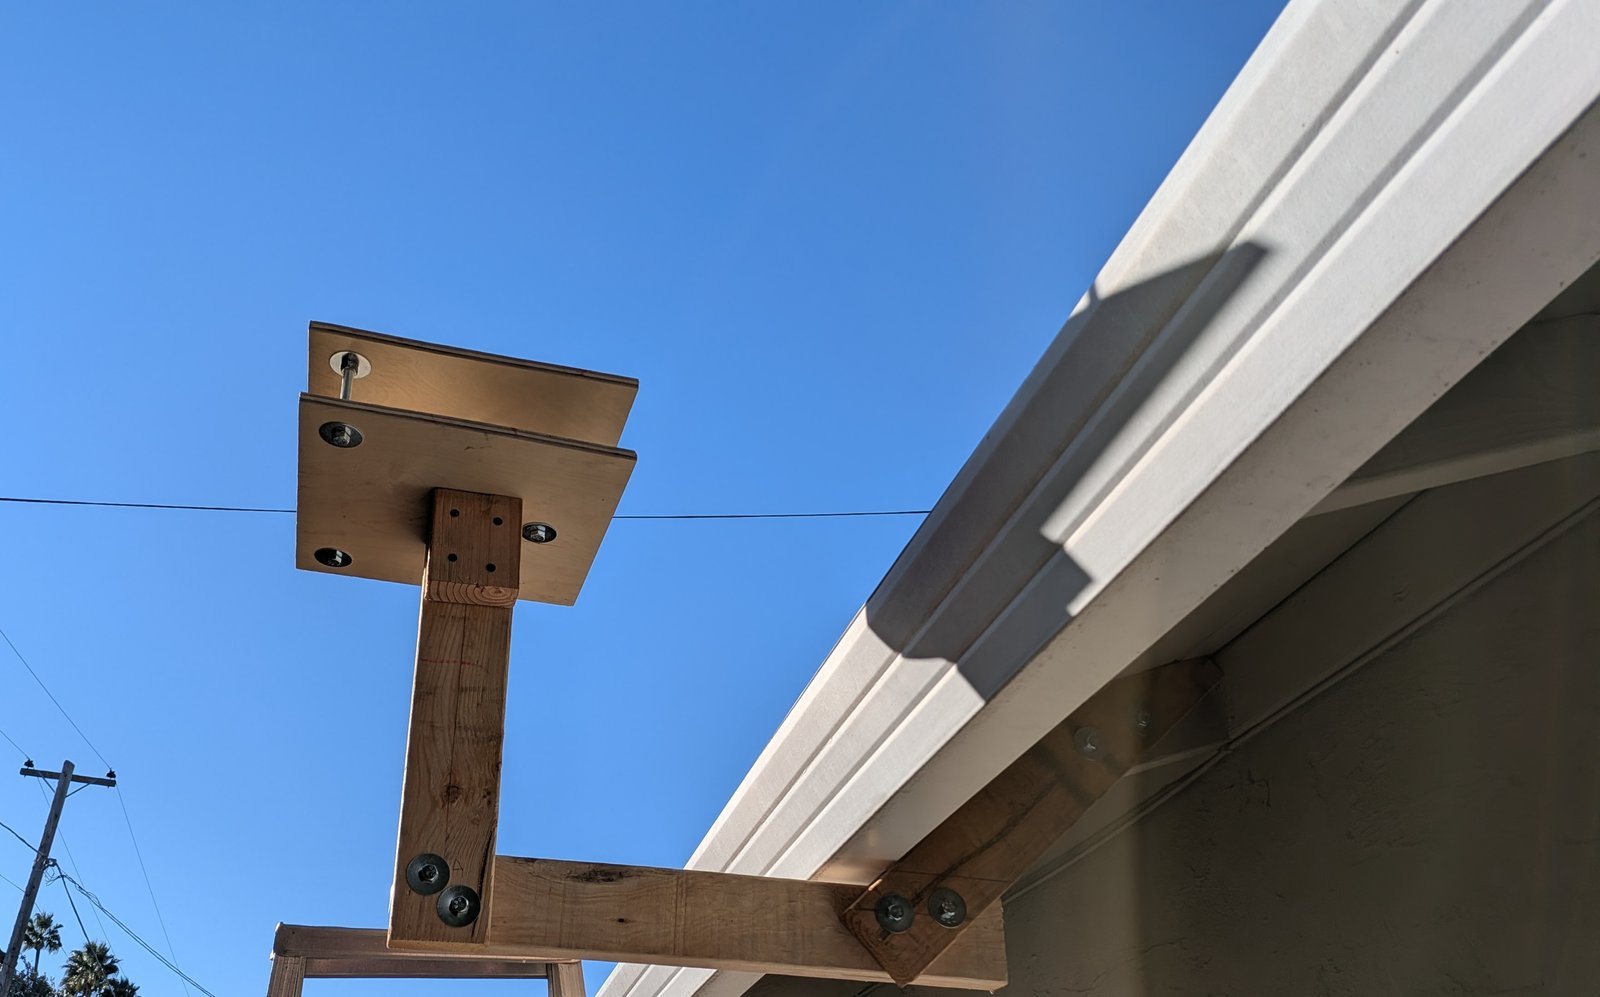
Three 2x4s hang the platform off the end of a roof rafter, the "rafter tail" you see under an open eave. The rafter arm bolts flat to the side of the rafter and angles down. The horizontal arm runs from it out past the gutter. The post stands on the end of the arm and carries the platform, with a short 2x4 "ear" on each side at the top to give the base plate more wood to screw into. Each joint is two pieces face to face with two 3/8" bolts.
Clearance is the main thing to get right. The post must lift the plates high enough that the scope, in every position it can swing to, clears the gutter and roof edge. In EQ (equatorial) mode the scope leans well over, so check the side facing the roof. Start with the post top at least 6" above the gutter.
- Trace your eave. Hold a big piece of cardboard flat against the side of the rafter tail, hanging below and sticking out past the gutter. Trace the rafter, the fascia (the board across the rafter ends) and the gutter.
- Lay out the pieces on the cardboard. Horizontal arm about 1" below the bottom of the gutter. Post a few inches outside the gutter's front edge, top at least 6" above the gutter. Rafter arm along the rafter, angling down to overlap the inner end of the horizontal arm. Read your lengths off the template and cut.
- Drill the two bracket joints. Clamp post to arm and arm to rafter arm as laid out. Drill two 3/8" holes through each overlap, spread apart and at least 1" from any edge.
- Bolt them together on the ground, washers under every head and nut. Tighten hard.
- Add the ears. Glue and screw a 6" 2x4 block to each wide face of the post, tops flush with the post top (two 3" screws each, pilot-drilled). Check the top is flat.
- Seal it: exterior paint or spar urethane, end grain especially. Don't drill the rafter holes yet.
Mount it on the house
This is ladder work at the roof edge. Have a helper foot the ladder and hand things up, and don't lean out past the ladder's rails.
- Bolt the bracket to the rafter. Hold it against the rafter with the horizontal arm level. Mark two well-spread holes at mid-depth of the rafter. Take it down, drill 3/8" through the rafter arm and the rafter, then bolt it up with washers both sides. Tighten hard.
- Push on the post hard in every direction. It should feel like part of the house. If it moves, a bolt is loose or the rafter is soft. Check the rafter for rot before you trust it.
- Screw on the head. Set the base plate on the post with its N arrow pointing north. Drill 1/8" pilot holes into the ears and drive the four 3" screws.
First night: level and align
- Level the top plate with the clamp's built-in bubble (check with the torpedo level), turning the B nuts. Tighten the C nuts while holding each B nut still with the second wrench. Re-check the bubble.
- Fit the plate to the TH10 indoors, with the bushing, long side in line with the way the head tilts. Tighten hard with threadlocker and draw a paint line across plate and TH10.
- Clamp the scope on. Carry the scope and TH10 out together, set the plate in the clamp with the scope leaning toward the N arrow, slide it to the stop, close the lever.
- Check clearance. In the app, swing the scope through its full range in EQ mode while you watch. Nothing should come near the gutter or roof.
- Rough-aim the TH10. Unlock its pan and turn it until it tilts toward true north (phone compass). Set the tilt scale to your latitude and lock it.
- Fine-align on stars. Run the Seestar app's polar alignment and adjust only the TH10's pan and tilt. Don't trust the scope's level sensor alone: here it said the axis was fine while the stars showed it 12 degrees off. When aligned, lock both hard and paint a tick on the pan ring and tilt scale.
Every night
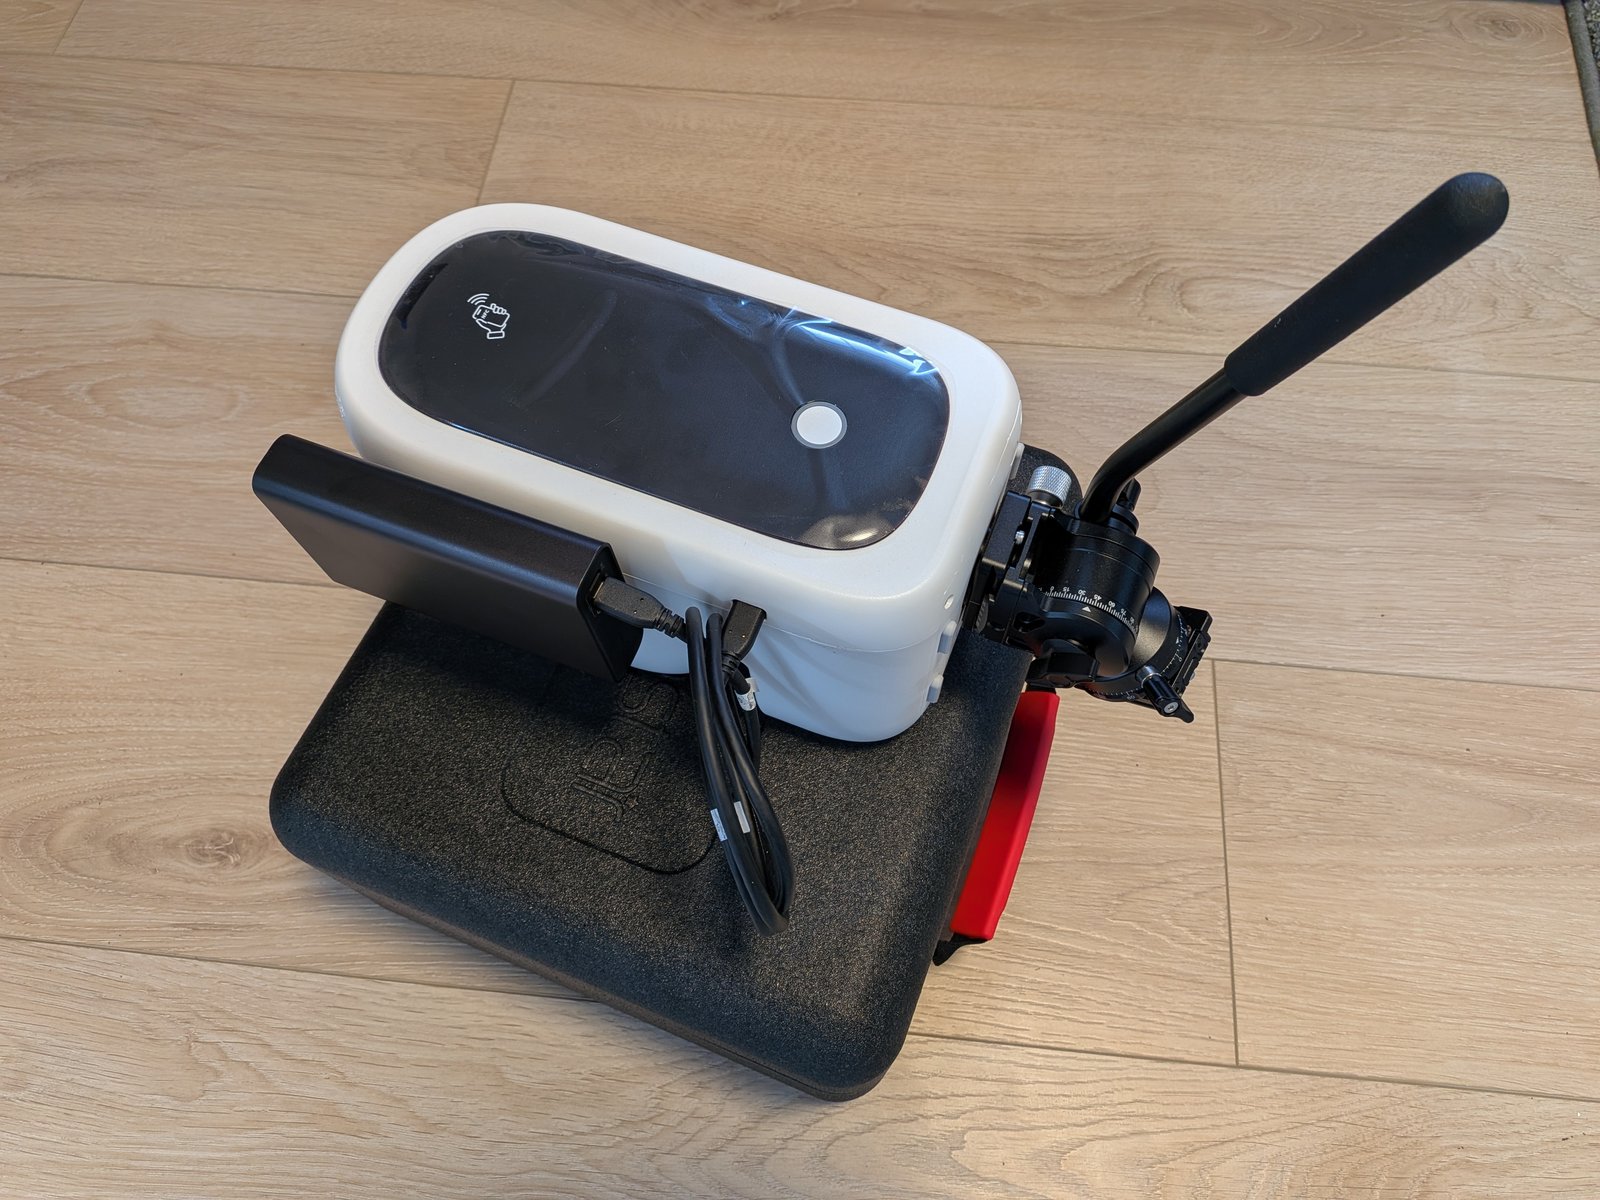
- Carry the scope out with the TH10 on it. Clamp it in, leaning toward the N arrow, and flip the lever.
- For an all-night run, plug in the power bank. The internal battery alone lasts about 4 hours.
- Turn it on and re-set EQ mode, even if it says it's already on. On the S50 Pro, tracking after a power-on was wrong until EQ mode was set again.
- Run a quick polar-alignment check. It should be within a fraction of a degree.
- In the morning: open the lever and lift. The platform stays out; the TH10 stays on the scope.
Tips
- If the alignment drifts, check the bubble first, then the paint lines on the TH10 and the clamp. Re-leveling moves the polar axis, so re-run the star alignment after any re-level.
- Stiff beats strong. Scope and TH10 weigh about 7 lb, but any flex shows as smeared stars on gusty nights. Keep every bolt tight.
- Keep the power bank snug against the scope. When it shifted slightly out of place, it was the likely cause of tracking trouble at some sky positions.
- Weather. The platform stays out. Put an upturned bucket over the clamp when the scope is inside. Check the bubble monthly and after big weather swings; quarter turns are plenty.